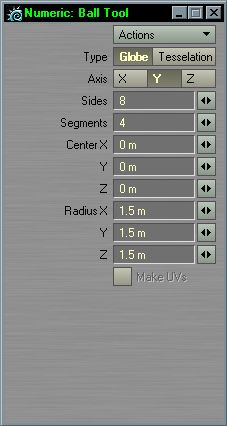
In
Lightwave Modeler, use Ball Numeric (ctrl
+ n after choosing Ball from the menu)
and create a "sphere" with the following
specifications.
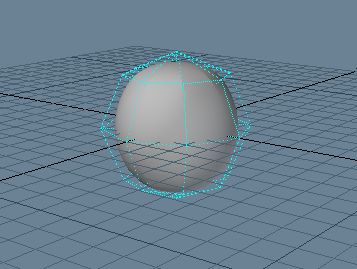
Once it is created, subpatch it (Tab).
Save it, and send it to Layout. It should
look something along the lines of this.
With
the objects button (at the bottom) selected,
open item propeties for your planet and
set render subpatch level to 5.

Now open up the surface editor. You should
have only one surface, Default. Leave
it that way. Enable Smoothing for Default.
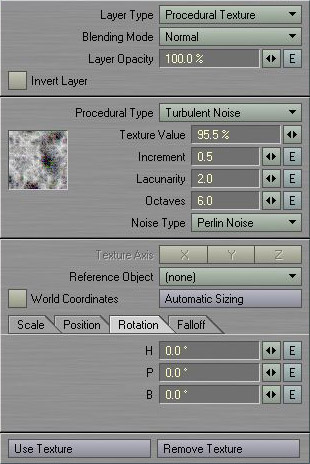
Set Bump at 200%, and open up the bump
texture window. Create a Procedural texture,
and adjust the settings to match the picture's.
Also set the texture scale to 250mm for
X, Y, and Z.
Set
antialising level to Medium, and frame
size to 640 x 480. Dont bother moving
the camera at this point. Render it (F9).
Hopefully it looks similar to the image
shown.
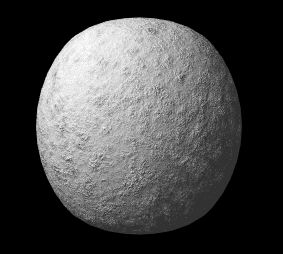
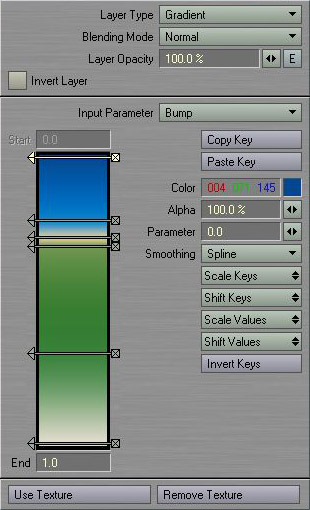
As you can see, our planet is lacking
in color. Open up the Color Texture options.
We want our color to be dependent on the
altitude (or magnitude of the bumpmap
in our case). So create a gradient layer,
and set the Imput Parameter to "Bump".
Now to specify when the colors will occur.
To make it quick, the RGB values are on
the left, and the Parameter value is on
the right of the dash. Enter these values.
4,71,145 - 0 21,134,202 -.2211 213,201,162
- .2807 114,151,83 - .3123 60,132,62 -
.6877 230,223,210 - 1
The Color texture window should look like
this when that has been entered.